AST
195 PROJECT
Lunar Observation – Crescent
Click here for cover sheet
In this project you are to
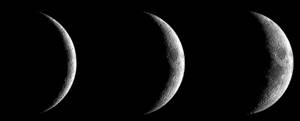
observe the moon when it is a Crescent. Note
that while several different crescents are shown as
examples in the picture below, you only need to do one observation of the crescent moon.
You will need your red light and clipboard for this project, and your finder needs to be in decent
alignment. Thus
you must complete the “Telescope Purchasing”, “Basics A”, “Basics B”, and
“Basic Observing Equipment” projects prior to attempting this project.
The following applies only to
the first moon project that you do:
ü
Click here for a video on finding the moon with your telescope. It will give you some extra information about
the practical difficulties involved in finding the moon.
ü
Make your own video showing you using your finder and telescope to
find the moon. This video must be “live
action”, including audio with your commentary (very important since you will be
shooting video in the dark). Post your
video to YouTube and e-mail the link to your professor.
Do the following for all
moon projects:
ü Print
out a copy of the “Near side of the Moon” map (click here)
ü Observe
the moon with both high and low power eyepieces.
ü Use the
“Your Guide to the Moon” (click here), the
“Near side of the Moon” map (click here – note that
this map can be enlarged a lot – and its orientation is different from the
“Guide to the Moon”), or similar lunar map to try to identify features on the
moon. This is not easy for a beginner,
so don’t think you are going to be able to list 25 features that you have
identified on the lunar surface. Keep in
mind that the view in your telescope may
be upside down or mirror-reversed
(or both) compared to what you are expecting.
For each feature, list its name,
and circle it on the “Near side of the Moon” map.
ü Select
3 features that you did identify, and attempt to draw them as seen through the telescope (make your drawings on the drawing sheet which you can print out
from the projects section of the class web page). You should draw the Moon as it appears in the
eyepiece -- the large circle on the drawing sheet will be the field of view of
the eyepiece, so your drawings of the Moon should fill as much of the circle as
the Moon fills of your eyepiece (do not use the circle on the drawing sheet to
be the edge of the Moon). Make your drawing while you are at the eyepiece, prior to taking photos.
ü Take
photos of the moon with your camera, through both the high and low power
eyepieces.
ü For
each of the three features you drew, look up information on it, and write a
paragraph describing what it is.
ü Write
a paragraph discussing what problems you experienced in this project, and what
successes you experienced.
ü Discuss
what you learned from this observing project.
Turn
in
§ Your video link via e-mail (first moon project only)
§ Your list of identified features (typed)
and your “Near side of the Moon” map with the features circled.
§ Your drawings of three features with
accompanying data
§ Printouts of the high and low power
photos (labelled appropriately)
§ Your three paragraphs on the three features
(typed)
§ Your problems/successes paragraph
(typed)
§ You “what I learned” paragraph (typed)